
The Ultimate Guide to Camping in Western Australia
Western Australia, a land of vast, untamed beauty, offers unparalleled opportunities for campers. From the dramatic red earth of the outback to the pristine turquoise waters of the coast, this state is a camper’s paradise. This guide provides essential information for planning your unforgettable outdoor adventure.
Exploring Western Australia’s Diverse Camping Environments
The sheer scale of Western Australia means its camping experiences are incredibly varied. You can choose from coastal paradises, ancient desert landscapes, lush forests, and unique island retreats. Each environment presents its own set of challenges and rewards.
The South West region is known for its tall karri forests and stunning coastline, offering numerous well-equipped caravan parks and national park campsites. Further north, the Coral Coast beckons with iconic destinations like Ningaloo Reef, where camping directly on the beach is a reality. Venture inland to the Gascoyne or the remote Pilbara for rugged outback experiences.
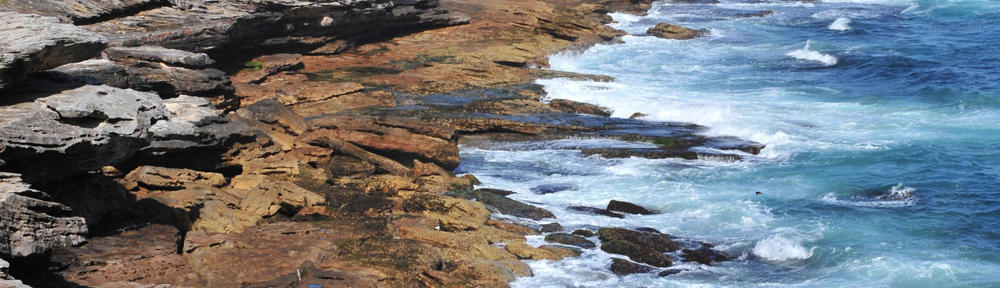
Coastal Camping Gems
Western Australia boasts thousands of kilometres of coastline, dotted with incredible camping spots. Rottnest Island, a short ferry ride from Perth, offers a unique island camping experience with beautiful bays and abundant wildlife, including the famous quokkas. Booking well in advance is crucial here.
Further north, the Ningaloo Coast is world-renowned. Campsites like those at Yardie Creek or Wapet Creek offer proximity to the reef, allowing for easy access to snorkelling and diving. Many of these are managed by the Department of Biodiversity, Conservation and Attractions (DBCA).
Outback Adventures and Inland Escapes
For a truly Australian experience, head inland. The Kimberley region in the far north is an adventurer’s dream, with destinations like El Questro Wilderness Park and the Mitchell River National Park offering rugged campsites amidst breathtaking gorges and waterfalls. This region requires robust 4WD vehicles and careful planning due to its remoteness.
The Goldfields region offers a glimpse into WA’s pioneering past, with historic towns and unique desert landscapes. Campsites near areas like Kalgoorlie or within national parks provide a base for exploring this fascinating part of the state.
Planning Your Camping Trip: Essential Considerations
Successful camping in Western Australia requires thorough preparation. Factors such as the time of year, vehicle suitability, and booking requirements can significantly impact your trip.
Best Time to Visit Different Regions
Western Australia experiences diverse climates. The South West is pleasant year-round, though winters can be wet and cool, ideal for cosy evenings by the fire. Spring (September to November) brings wildflowers.
The Coral Coast and Pilbara are best visited during the cooler, drier months, typically from April to October. Summers in these regions are extremely hot and humid, with the potential for cyclones.
The Kimberley has a distinct wet season (November to April) with heavy rainfall and high humidity, making travel difficult and some areas inaccessible. The dry season (May to October) is the ideal time for exploration, offering pleasant temperatures and clear skies.
Vehicle and Equipment Essentials
Your choice of vehicle depends on your destination. For most coastal and South West camping, a standard car may suffice. However, to access many of the more remote national parks and outback locations, a 4WD vehicle is essential.
Essential camping gear includes:
- Tent or Swag: Appropriate for the expected weather conditions.
- Sleeping Gear: Warm sleeping bags, mats, and pillows.
- Cooking Equipment: Camp stove, fuel, pots, pans, utensils, and a cooler.
- Water: Ample supply is critical, especially in remote areas. Consider water filters or purification tablets.
- First-Aid Kit: Comprehensive and well-stocked.
- Navigation Tools: Maps, compass, and GPS device.
- Insect Repellent and Sun Protection: Essential for comfort and safety.
- Rubbish Bags: Pack it in, pack it out.
Booking Campsites and Permits
Many popular camping areas, especially within national parks managed by DBCA, require advance bookings. Websites like the DBCA’s Parks and Wildlife Service are invaluable for checking availability and making reservations. Booking platforms like WikiCamps Australia can also provide detailed information on campsites and availability.
Some remote areas or Aboriginal lands may require special permits. Always check with local authorities or the relevant park management agency before your trip. Campfire restrictions are common, particularly during warmer months, so always check current fire bans.
Responsible Camping Practices
Preserving the pristine beauty of Western Australia’s natural environments is a shared responsibility. Adhering to responsible camping practices ensures these places remain beautiful for future generations.
Leave No Trace Principles
The core of responsible camping is the Leave No Trace ethos. This means:
- Plan Ahead and Prepare: Know the regulations and special concerns for the area you’ll visit.
- Travel and Camp on Durable Surfaces: Stick to designated campsites and trails.
- Dispose of Waste Properly: Pack out everything you pack in, including food scraps.
- Leave What You Find: Do not remove natural objects or historical artifacts.
- Minimize Campfire Impacts: Use existing fire rings, keep fires small, and ensure they are fully extinguished. Be aware of fire bans.
- Respect Wildlife: Observe animals from a distance and never feed them.
- Be Considerate of Other Visitors: Keep noise levels down and respect others’ experience.
Water and Wildlife Safety
Water safety is paramount when camping near the coast or rivers. Always supervise children closely and be aware of currents, tides, and potential marine stingers. In freshwater areas, be mindful of submerged objects.
Wildlife encounters are part of the WA experience. While most animals are harmless, it’s wise to be cautious. Store food securely to avoid attracting pests and never approach or feed native animals. Be aware of snakes, particularly in warmer months, and take precautions by wearing sturdy footwear and being observant.
Must-Visit Camping Destinations
Western Australia is brimming with spectacular camping locations. Here are a few highlights to inspire your itinerary.
1. Karijini National Park
Located in the Pilbara, Karijini offers breathtaking gorges, crystal-clear rock pools, and stunning waterfalls. Campsites like Grandetamite Campground provide a base for exploring this ancient landscape.
2. Ningaloo Coast
Experience world-class snorkelling and diving right from your campsite. Options range from basic beach camping to more developed sites, all offering incredible marine life encounters.
3. Margaret River Region
Known for its wineries and surf breaks, this region also offers beautiful forest and coastal campsites, perfect for a more relaxed camping experience.
4. Cape Le Grand National Park
Near Esperance, this park features iconic white-sand beaches, granite outcrops, and turquoise waters. Le Grand Beach Campground is a popular choice for its stunning location.
Western Australia’s vastness and natural beauty promise an unforgettable camping adventure. With careful planning and a commitment to responsible practices, you can immerse yourself in the magic of this incredible state.


